 If you read Monday’s post (Novel Revision Strategies: Printing for Read-Through), you know I am using a printed draft for this stage of novel revisions.
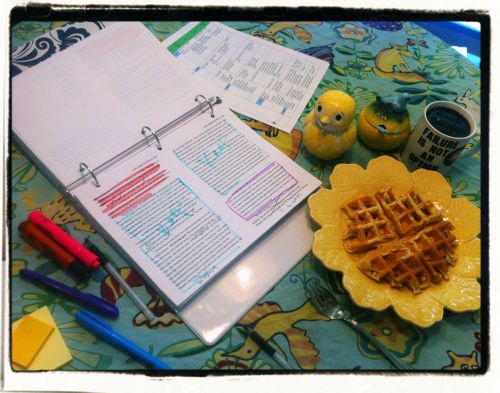
Today’s post is a photo diary of what morning work looked like — as waffles with the boys shared space with ruthless edits on this draft.
“Failure is not an option”?
Go “where’s Waldo” to find the NASA slogan on my coffee mug: Failure is not an option.
Even as writing and revising drafts is all about failing over and over again? Yeah, I still love that mug’s inspiration. I bought it on a trip to Cape Canaveral with my rising-7th grader when he was in 4th grade. Ever wondered about the explosive launch sequence pictured on my blog’s masthead? That was taken on the same trip — a re-enactment of the control room for a successful Gemini launch. We’re in that control room when writing, and the mug reminds me to never stop.
Novel writing is launching into the risk of failure, the surging insistence that it will go well. The rocket will launch. Risk embraced.
Or, go with Samuel Beckett as inspiration: “Ever tried. Ever failed. No matter. Try again. Fail again. Fail better.” Drafting and revising is all about getting something down. Being willing to fail as well as we can, then trying again, even failing again — but failing better. In that sense, the mug would say, Giving up is not an option.
So, here’s where that has gotten me in the past couple days…
These are probably my favorite revision pages:
This is what less happy pages look like:
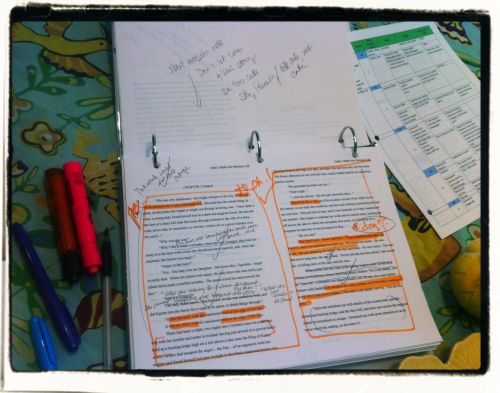
Ohhh… that looks painful. Chickie is staying out of it. BUT, check-marks show the changes have been made in the new computer draft. Work goes on. c. Elissa Field, repro w writ-permiss
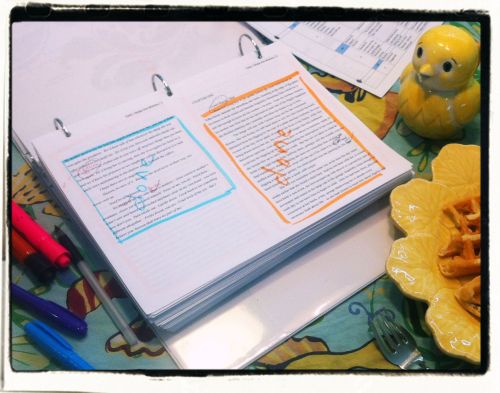
If you read the captions, you see the range of changes going on.
The top picture shows pages from the opening scenes of my WIP, which are ready to go — marked “done.” I also signal “done” in the computer document by changing that text to blue. Yup, plain text: that leaves you vulnerable to being cut.
The second pictures shows a scene that has been outlined with highlighter to say it will be kept (although not “done”), with corrections marked. Where I still have questions to answer, I wrote them on the blank page above to make sure they won’t get lost.
Apparently I was not mean enough to take a picture of pages with entire scenes X-ed out, but they are there. I do paste deleted text into a “Cuts” document… just in case.
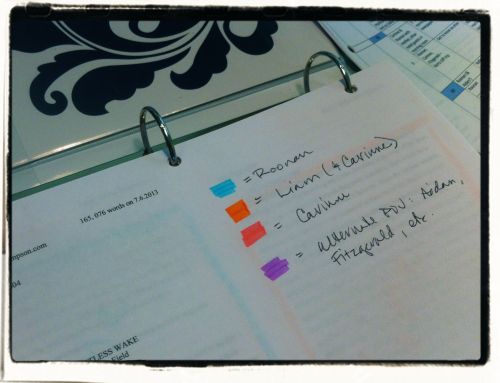
The colored highlighter is an example of what I mentioned in yesterday’s post about using color codes to mark key scenes or characters.
Here’s the color key:
This is the key on the first page — so far I’ve been marking the text that will be kept with a highlighter for the main character it relates to. Being able to visualize this helps, as this edit is all about getting the final structure in place, then seeing what’s missing.
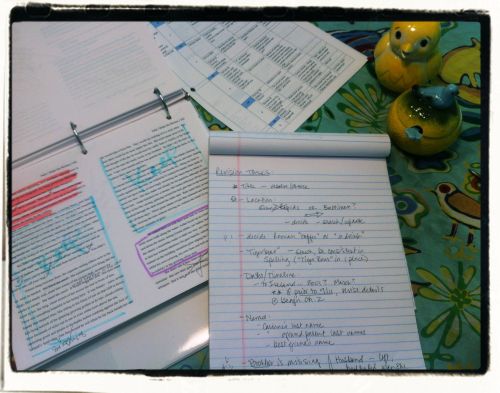
Creating a Style Sheet – or, um, Lengthy To-Do List:
Every hour or so of reading, I go back to the computer draft to implement the changes. I’ve been checking corrections off to keep track of what’s been done, and also gathering this chapter-by-chapter task list of questions that need to be resolved. So far, it includes facts to resolve, like names, family names, locations, dates — as well as plot details that have changed between drafts and need to be made consistent.
If you want to read more about creating a “style sheet” to manage your novel, check out this post by literary agent Rachelle Gardner: Create a Style Sheet for Your Manuscript .
A Party so Wild it Needs a Bouncer – Enter the Outline:
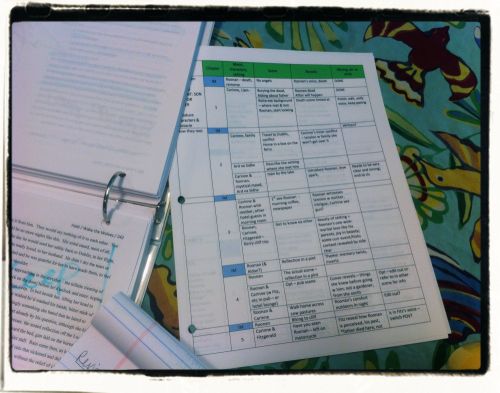
Really, most of this mark-up on the draft took place yesterday. I came back to it this morning knowing I was still swamped in some choices. I had a clear list of scenes in my head, and knew the order I need to shift them into. As clear as it was in my head, with the story changes that took place between drafts, I need to keep track of the order of important reveals and progression of internal and external conflicts.
Enter the Bouncer, tough guy outline watching over the WIP’s shoulder above. Yes, it looks a bit techie — I am used to throwing Word tables together to manage info, so that works for me.
The Bouncer outline works like this: like velvet ropes deciding who will be allowed into an elite club, if a scene is not on this list, it won’t stay in the draft.
As much as writers chat about whether to “pants” or “plan” I believe fully in a hybrid of the two. In order to finish this outline, I had to analyze my understanding of the story. It reminded me of a couple scenes not written yet, and helped me better analyze how to get the right tension and resolution at the end. Mean as he looks, the list makes my job so much easier.
* * * * *
How About You?
It’s been great to read comments from readers about their own process for revising — share yours as well?
Rather than revising, are you focused on writing new material? It was also great to connect on Twitter today, as Wordsmith Studio writers hosted wordsprints. Check out the hashtag #wschat to find writing activities each week.
* * * * *
If you like this blog, be sure to subscribe using WordPress’s +follow option, or via email or RSS feed. I love to connect with like-minded readers and writers!
Recent Posts:
- Friday Links for Writers: 07.05.13

- Living With Books 08: Life, Liberty & the Pursuit of Books
- Motivated to Write: 12 Tools to Get Writing Now
- Tuesday Writes: Camping with Friends
- Novel Revision: Work is Messy, Book May Bite
- Novel Revision: Revising a Flat Character
- My Summer Reading List 2013
Posts mentioned in this article:




A happy page of revision, in my world, looks much like yours.
Thanks for the visual walk-through of your revision process. It’s always neat to see how other writers work through the tough part (aka: revision).
LikeLike
Thanks, Stacey — that’s what I thought. I’ve really enjoyed reading the processes other writers have shared (on yesterday’s post). Partly it’s fun to commiserate and we also learn from each other. Thanks for commenting.
LikeLike
Your post title drew me to your blog today. I wanted to see the pictures. I wanted to see how others do what I find the hardest thing to do and to teach. Perhaps I need to experience a bit more revision in my own writing in order to become a better teacher for my students.
LikeLike
That’s great to hear, Jaana. It does help to empathize with kids and give examples of how to work around things when you’ve wrestled with it yourself. I’m glad to see you here – thanks for commenting.
LikeLike
Wow, this was such a fascinating peek at your revision process! I can’t imagine writing a novel… wow. I love your color-coding and highlighting… and your cute chicky! The NASA mug was a neat detail too. Thanks for sharing!
LikeLike
Thanks, Jennifer. I know I’ve had the same reaction when other writers shared their process, and somehow the pictures seemed the way to go today. I’m really big on color-coding, or any method a person can use to break down text. I’ve used the same process with students, breaking down a speech by Patrick Henry or finding the Intolerable Acts in the Declaration of Independence. It’s great for anyone to know they can take control of the document, not be lost in it — and it saved me in wrestling this draft. Thanks for commenting – glad to see you here.
LikeLike
Pingback: Failure is not an option! | Words from JL
This is great. Thanks for showing how you edit your project. It looks very organized and I will follow your lead when I get back home to dig into mine again; even though I recently finished a re-write, my novel still has plot holes. I tend to be a pantser and am working hard to train myself to be a planner. Thanks again for the tips!
LikeLike
Thanks, Linda. ::Sighing:: Yes, I’ve been really organized with this particular revision. In part, that has to do with the stage of revision I am in: there are more times when “revision” takes place as more organic “living with” the ms, or research, or casual re-reading. This read-through is to see how well all of those prior steps held together. … And the long sigh comes because, 2 days after this cute breakfast scene, revisions are wearing me out. Staying organized has helped, but it’s still just plain hard work.
I can relate to your plot holes. Most frustrating for me has been discovering that certain scenes are *missing* from the draft. I think the scariest thing is to *know* you wrote something but not be able to find it. I just spent time rooting through email, where I found a couple scenes I’d dictated in Dragon Dictation and emailed to myself that hadn’t made it into the draft… but I’m still missing at least one.
Thanks for commenting, and good luck with your writing!
LikeLike
I do my revisions on the computer for the most part. I once broke my novel into documents following one character at a time. This helped me create a story arch for each character without paying attention to what they weren’t aware of.
LikeLike
Jo, thanks for sharing this part of your process. It’s interesting to focus on one character at a time. It sometimes seems to add work to the process, but it’s amazing what you discover (and holes you notice) when you focus on them one at a time. Thanks for commenting and good luck with your work.
LikeLike
How were you able to print your pages out like that?
LikeLike
Hannah, sorry I didn’t see your question earlier. Hmm… I know I am using a newer version of Word now than when I posted this, so let me go visit Word and see exactly where to find it…
Ok. In Word, select File > Print.
You then have the bar of options to customize for the print job. Toward the bottom, an option will show “Print 1 page per sheet” – click the menu option for this and reset to Print 2 pages per sheet.
When I do this, I will also have selected Narrow for margins, landscape style printing, and I think I set the font to 10 or 11 pt with 1.5 line spacing.
It is my favorite way to view a manuscript while editing. I am better able to view chunks of text and create markup.
Hope this helps.
LikeLike
Thank you for inspiring me to revise using the side by side layout. I liked your process so much, I wrote about it. I gave you a link and a shout out on my blog :)
http://www.laurakayellis.com/2016/01/first-novel-revision-blues.html
LikeLike
Great to see you here, Laura. “Slow and magical” — your experience (in your post) is SO TRUE. Magical moments of discovery… and days when it drags and drags… It was great to read your process. I was so busy with clients this year that I am WAY overdue updating here on the progress — and new processes — I’ve made, myself.
Best to you in the new year!
LikeLike